Have you ever heard the saying: “If you want to make a million dollars farming, start with a billion”? We’re not going to tell you that running your own farm or ranch, no matter what size the scale, is not expensive, but we do know that there are a lot of ways to mitigate costs and increase efficiencies.
This is a topic we’re going to talk about a lot. Farming and ranching is in serious need of a come back and it’s not going to happen nationally if it’s not profitable. And hey, we want to quit our day jobs too.
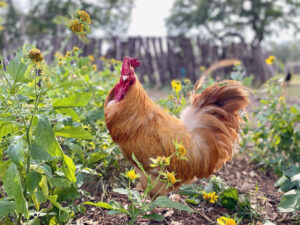
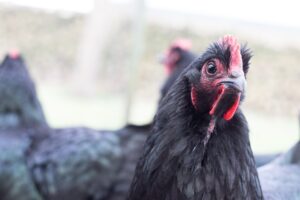
Chickens are what we like to call the gateway drug to homesteading and ranching. They are easy to acquire, damn cute as little chicks (although we think our hens and roosters are mighty cute too), and for the most part, pretty easy to take care of.
The Cost of Raising Chickens
Alright, so we know they are cute and basically dinosaurs, but are chickens expensive to raise? Well, that depends. And it depends mostly on what you are feeding them. Let’s talk costs.
Chicks
Depending on breed and quantity, chicks can run anywhere from $2.00 to $6.00. When buying checks find out if they are straight run or sexed. Sexed chicks will be all female, and buying straight run is playing the rooster lottery. Ideally, you want to keep a flock that has a ratio of 1:10 with one rooster to ten hens. Having less hens per rooster can lead to the hens becoming overworked resulting in featherless backs and traumatized ladies who spend their days running from roosters instead of thriving.

Pro tip: the upfront cost of an incubator can save you year after year in chick costs. We also just think hatching your own chicks is one of the coolest experiences you can have on the homestead or ranch, especially if you have kids.
Coops or Chicken Tractors
We can’t name a cost here because it really runs the gamut. At Mother Luck Ranch our coop structures really vary depending on the needs of our flock. We use DIY chicken tractors for broiler chickens out on the pasture and our ranch had a few built in coops we utilize for our free-range laying flock, along with some early rendition chicken tractors that were a little too heavy and have since been retired as free-range breeding flock and duck flock homes.
DIY and upcycling are not just ways to save money around the ranch – often it’s the only way to get what you need. Sure, you can get a cute backyard coop for 3-5 hens, but anything more than that and you are looking at making it yourself.
Feeders and Waterers
Again, this cost can quickly vary from a little to a lot. You can DIY with PVC pipe or get fancy with a 25 lb. capacity trough feeder. As we focus on automation at the ranch, we are moving away from traditional chicken feeders to utilizing a deer feeder for our free-range flocks. This enables a greater capacity, which means less time filling the feeder, and daily automated release of the feed.

Feed
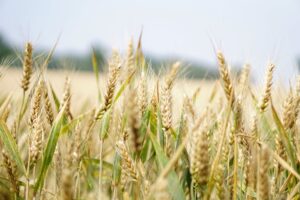
And now for the most expensive cost of raising chickens: feed. First and foremost, and something not nearly discussed enough, is quality of feed. The level of nourishment that the feed provides not only makes a difference in the amount of feed consumed, but also in the quality of meat and eggs produced.
If you are local to the Hill Country, TX we retail the very best feed around: H and H non-GMO, soy free feed. Finding a feed partner was our first priority when we began raising chickens. Sure, we got by on the organic feed from Tractor Supply for awhile, but their supply is limited and they were often sold out or we were only able to get a bag or two at a time.
We truly lucked out and saw a sign for H and H Feed on a country drive for nap time with the girls. We were hopeful about the prospect of finding a new supplier after reading that they were non-GMO, but not overly so as we had already hit a dead end with another highly recommended non-GMO source.
Here's the kicker if you don't already know: non-GMO does not mean glyphosate-free. In fact, oftentimes non-GMO grains are sprayed with glyphosate as a desiccant a few weeks before harvest. Non-GMO labelling does not mean a whole lot these days - just another form of greenwashing.
The first local non-GMO grain mill we spoke with was not aware of that information and had no interest in continuing the conversation with us or his farmers.
Speaking with Joanna at H and H was a breath of fresh air. She assured us that she was aware of the practice and had long-running relationships with all of their farmers, assuring us that there were no added herbicides or pesticides used on their grains.
Ways to Cut Chicken Feed Costs
Table Scraps
We’ve seen homesteaders feed their laying flocks on mostly table scraps. It can be done, but it takes more meal planning than we’re capable of as a family right now. However, feeding your chickens table scraps is an excellent way to supplement your feeding program.

We like to keep a chicken scrap jar on the counter so we remember to save some scraps for the flock. This helps to keep everything from just going into the compost pile. Pro tip: use a container that doesn’t have a lid so you empty it frequently. We started with a cute ceramic jar with lid, but most days the scraps just ended up compost before we remembered to take it out. An open container will ensure that you are prompt in sharing the scraps with your flock.
Mealworms & Black Soldier Fly Larvae
You can buy dehydrated mealworms for your flock, but that’s not exactly frugal. If you are really looking to cut chicken feed costs, raising mealworms (which are actually darkling beetle larvae) and black soldier fly larvae at home is a great way to grow your own protein source. Reminder that chickens are true omnivores and require 16% – 20% protein depending on age and breed.
Free Range & Fresh Pasture
This right here is the ticket, in our opinion, on cutting feed costs and raising both healthy and happy chickens. Barring the frumpy and lazy Cornish Cross, chickens are excellent foragers. Give them access to well cared for pasture and farmland and they will spend their days nourishing themselves. However, even with the best of pastures, we still recommend supplementing with a daily feed for optimal health.
Fermenting Feed
While table scraps, mealworms and black soldier fly larvae, and fresh pastureland can all aid in cutting down feed costs, chickens are still a domesticated animal and thrive with support of a well-sourced feed for a wholistic nutrition profile. Fermenting feed is a tool to help not only cut the cost of feed but also increase the nutritional value. Fermenting chicken feed means that the flock will eat less feed while receiving greater nourishment.
STEPS TO FERMENTING CHICKEN FEED
I know it sounds a little intimidating, and there’s something you should know…
It’s really simple!
Step 1: Place the feed in a container.
Step 2: Cover the feed completely with fresh, de-chlorinated water.
Step 3: Cover the container.
Step 4: Wait for 3 days.
Step 5: After 3 days, strain the liquid out.
Step 6: Feed the fermented feed to the chickens!
TIPS FOR FERMENTING CHICKEN FEED
Choosing the Container
When selecting a container to ferment your feed in choose a food safe material. We recommend glass or for larger quantities food-grade and BPA-free plastic will work. Metal is not recommended for fermenting so break out the wooden spoon for stirring.
There should be plenty of open space at the top of the container and the lid should keep critters out but not be air tight so that the gasses can escape. Pellets will expand more than grains. Only fill the container about half way with pellets.
For smaller flocks, half gallon mason jars work excellent. A tea towel or cheesecloth can be secured to the top in lieu of a lid. For larger flocks, we like to use the Tractor Supply 5 gallon pail with holes drilled in the top of the lid and a layer of cheese cloth secured under the lid.
De-Chlorinating the Water
If your water source is not already free of chlorination, you can de-chlorinate the water by allowing it to sit in the sun for 24 hours. The UV rays will assist the chlorine in evaporating form the water.
The Fermentation Process
Keep the container in a cool, dry location. Stir the mixture a few times each day.
Bubbles are an indicator the fermented feed is ready. When ready the feed will smell sweet. If it smells rancid, it is rancid – throw it out.
Rationing Your Feed
Fermented feed is more prone to mold so only feed what the chickens will eat as any fermented feed left in the sun is likely to mold quickly. With fermented feed, you can give your chickens about half as much daily feed as normal.
We recommend a rotational system with three containers so that each day you have your daily fermented feed fresh and ready to strain. When you get comfortable with fermenting you can work a continual system where you scoop grains out of your bin each day and stir dry grains in, keeping the water level above the grains, but no longer dumping and resetting with each day.
BENEFITS OF FERMENTING CHICKEN FEED
Better Digestion
The fermentation process improves digestibility of grains, and the lactic acid bacteria promote the growth of probiotics which also aid in digestion and provide wholistic immune support for the chickens. Fermentation also increasing the bioavailability of nutrients in the feed.